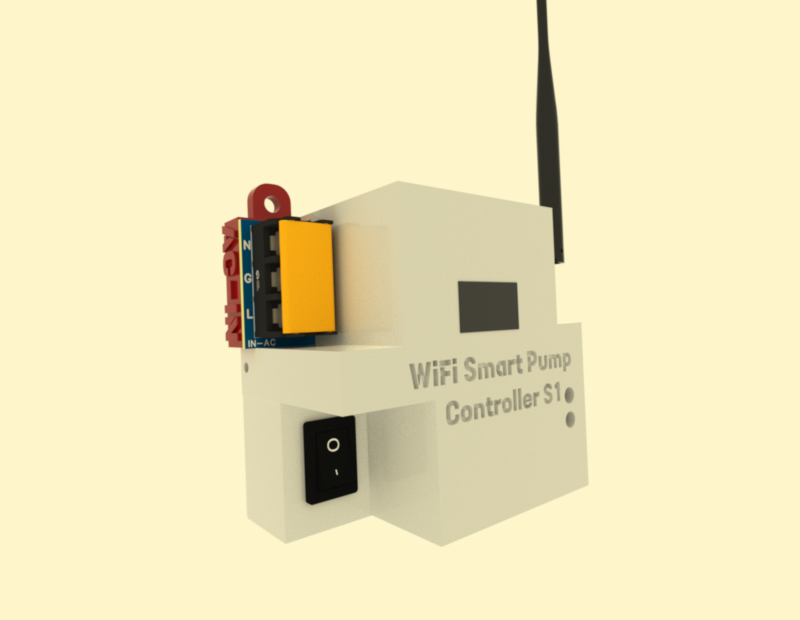
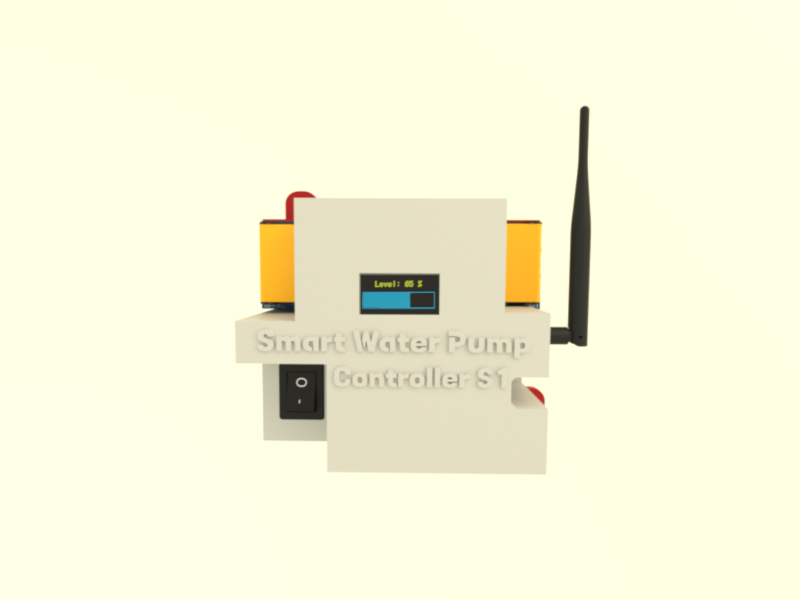
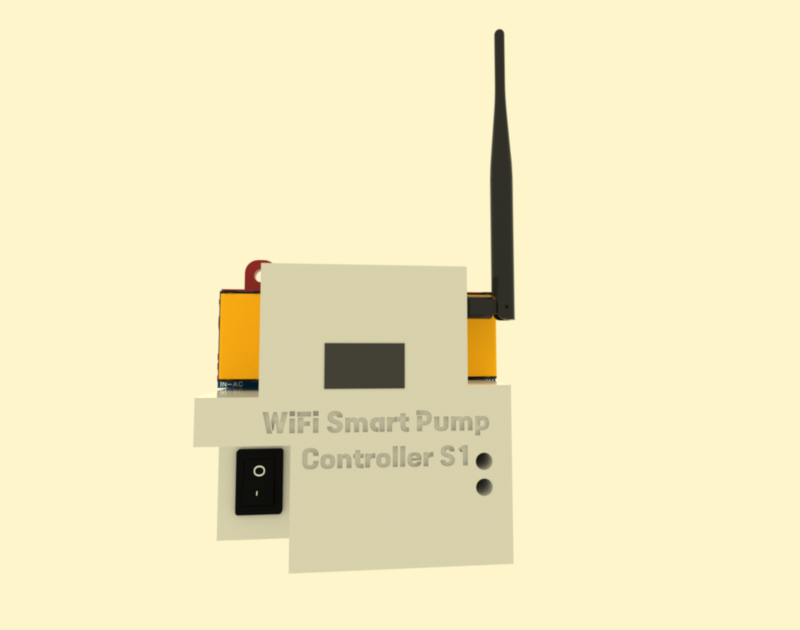
Manual: WiFi Smart Water Pump Controller S1
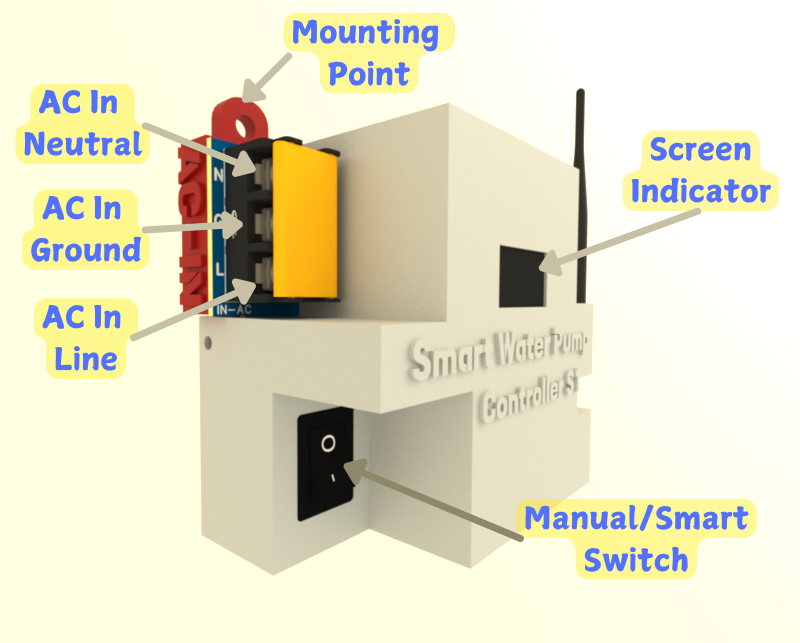
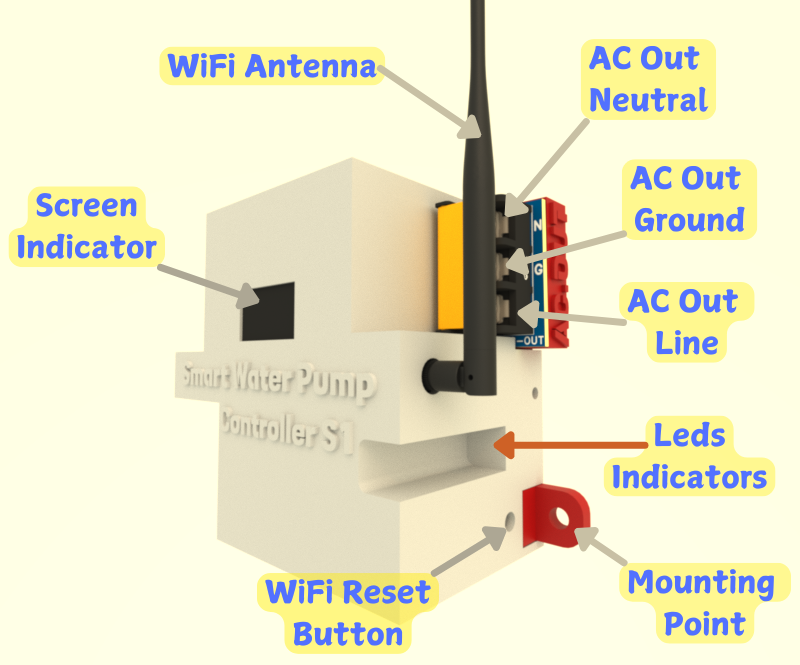
Smart Pump Controller S1 Parts
Installation And Usage Guide
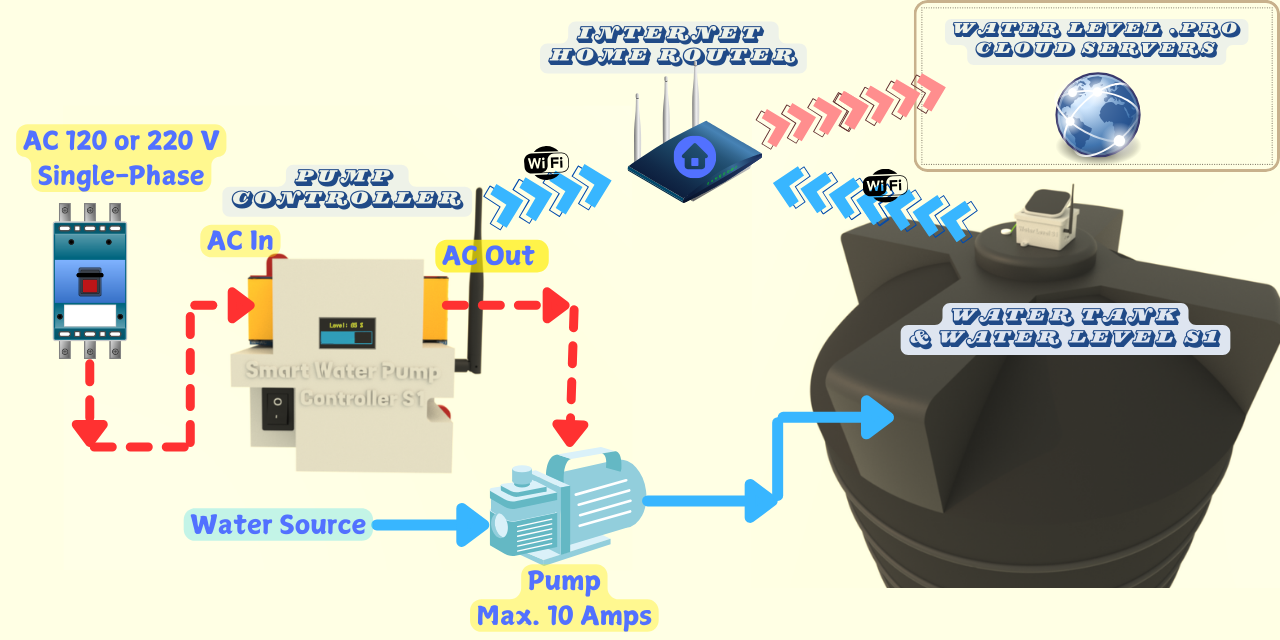
Ensure that good 2.4GHz WiFi signal will reach the device area all the time.
Optimal Wi-Fi signal strength is crucial for device performance. Before installation, use a mobile app (WiFi Analyzer) with a 3dBm reference antenna to measure the signal at the location. Ensure it's between -30 dBm and -78 dBm. After connecting, regularly verify this on the device's webpage.
If WiFi signal strength is weak consider add WiFi range extenders.
Pump Requirements
Ensure the pump's power consumption does not exceed 10 amps to prevent potential damage or system overload. This translates to a maximum of 1200 W for a 120 V system and 2200 W for a 220 V system. Exceeding these limits may compromise system safety and functionality.Power Requirements
The device requires a power input of AC 120V or 220V, 50/60 Hz, with a single-phase connection and neutral line.Safety Requirements
Since this is an experimental device, the user is responsible for ensuring safe installation and operation. Make sure the system has a thermal breaker for protection and avoid placing it near flammable materials. The user should also monitor the device regularly to ensure it operates correctly and safely.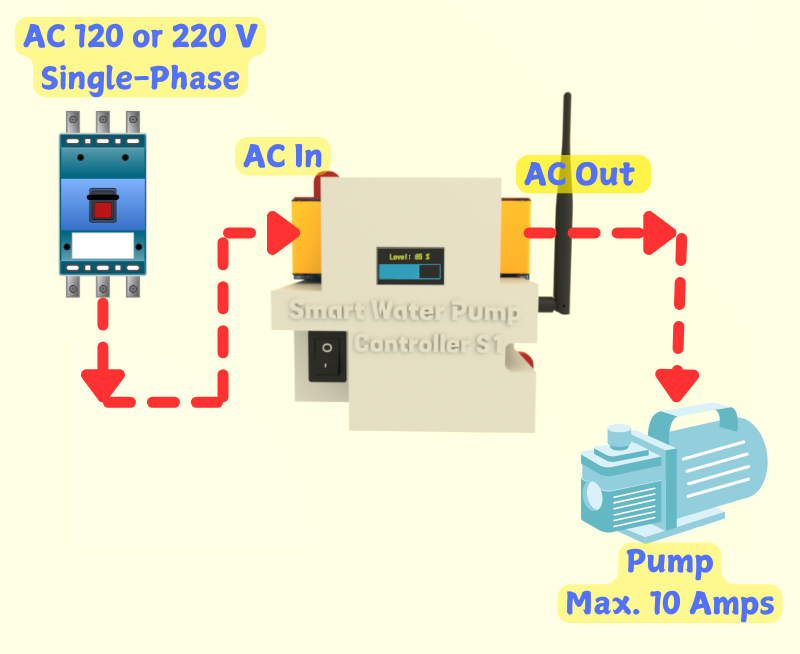
Device Connection Instructions
1. Select Proper Cables:
Use cables that can handle the amperage of the pump (up to 10 amps) to ensure safe operation.
Make sure the cables are rated for the required power load.
- Identify the AC input wires: You will need to identify the Line (Live), Neutral, and Ground wires coming from the power source.
- Connect the wires to AC-IN: Connect the Line (Live) wire to the Line (L) terminal, the Neutral wire to the Neutral (N) terminal, and the Ground wire to the Ground (G) terminal on the device's AC-IN section. Make sure each wire is properly secured to avoid any loose connections.
- Connect to the pump: In the AC-Out section of the device, repeat the process by connecting the Line wire to the Line (L) terminal, the Neutral wire to the Neutral (N) terminal, and the Ground wire to the Ground (G) terminal.
- Make sure the connections are correct, secure, and tight to ensure reliable operation of the pump.
4. Mount the Device:
Use the mount points on the device to securely attach it to a wall
or other stable surface. Ensure the mounting location is dry, accessible, and allows for proper ventilation around the device.
5. Verify Connections:
Before turning the device on, double-check all connections to ensure they are correctly placed and there are no errors. Incorrect wiring could lead to malfunctions or damage to the pump.
In this step, configure the device to connect to your local internet WiFi network
This will allow you to link the device to your profile and personalize your settings.
Steps:
- 1) Connect the device to an AC power source and switch the Manual/Smart Switch to the ON position. This will power on the LEDs and screen, enabling the smart features of the pump controller. Ensure the WiFi antenna is securely connected to the Pump Controller.
-
2) Using a cellphone, search and connect to a 2.4GHz WiFi network named WaterLevelProSetup with credentials/password: 1122334455
If the network name doesn't show or disappears quickly, check AC power input or press the WiFi Reset button at Pump Controller.To reset the WiFi, press the WiFi Reset button 5 consecutive times.
-
3) Enter your local WiFi auth info.
After completing step 2), a Captive Portal will appear on your cellphone. This will guide you to a webpage where you can select the desired Wi-Fi network and enter its credentials. You will also be prompted to enter an email address to link the device to your existing account.
If the Captive Portal don't load automatically use this url http://192.168.4.1/ to load it manually from cellphone.
-
4) Check your device is online
Reconnect your cellphone to the internet and log in to your Waterlevel.Pro account. If everything was successful, after 2 minute, you will see the new device listed in your account with an "Online" status.
If the device does not show online after 2 minute, try reconnecting the power source or repeating the entire process after pressing the WiFi Reset button 5 consecutive times on the device.
Using Smart Functions for Automatic Pump Control
To enable the smart automatic start and stop features, a Water Level S1 sensor must be installed in the water tank connected to the pump controlled by this device. Carefully read the installation and usage manual for the Water Level S1 sensor and ensure it provides reliable and stable information under your specific conditions before activating the smart functions.
How Enable The Smart Features:
-
1) Log in
Log in to your WaterLevel.Pro account using the same email address provided during the device's Wi-Fi setup. Ensure both emails match for proper account synchronization.
-
2) Enable the "Smart Mode" in Device Settings
After logging in, find your new device in the "My Devices" list. Open the device's details page and click the "Device Settings" button at the bottom.
In the settings, enable the "Smart Mode". All the settings are documented at "Device Settings" sections.
UI Demo Device -
Manual/Smart Switch must be set to the ON position to activate the smart pump controller. This ensures the LEDs and screen turn on, allowing the smart features to function properly.
Using the Manual/Smart Switch Button
The physical Manual/Smart Switch button on the pump controller allows you to operate the pump manually, functioning like a simple switch that turns the pump on without requiring internet or smart features. To enable this, move the Manual/Smart Switch to the OFF position. The LEDs and screen will turn off, but the pump will start running.
This open-source electronics project/device is provided strictly for experimental, educational, and developmental purposes. It is offered "as is," without any warranties, express or implied. This includes, but is not limited to, implied warranties of merchantability, fitness for a particular purpose, or non-infringement.
By using this device, you acknowledge and accept that:
- You assume all risks associated with its use, including but not limited to potential damage to property, personal injury, or any other unintended consequences.
- This device is not certified for commercial, industrial, or safety-critical applications. It is intended solely for developers, hobbyists, and other users with appropriate technical expertise.
- The creators and distributors of this project are not liable for any damages, losses, or inconveniences resulting from its use, modification, or integration into other systems.
Users are solely responsible for ensuring that the use of this device complies with local laws, regulations, and safety standards in their region.
Open Source & Open Hardware
This project is open-source and open-hardware. Access the source code and hardware design files through the following links:
